2 Weeks in Argentina: The Ultimate Travel Itinerary
Trying to decide on an itinerary for Argentina can be overwhelming — I get it.
Argentina is the second-largest country in South America, known for its vibrant culture, diverse landscapes, and world-famous cuisine.
From the lively city streets of Buenos Aires to the glaciers of Patagonia to the waterfalls of Iguazú Falls, the country provides a wide variety of adventures!
The good news? Two weeks is enough time to experience all of it — and that’s exactly what I did and I’ll help you, too!
Whether you’re looking to hike through the mountains of Patagonia, stand in the middle of hundreds of roaring waterfalls, indulge in asado barbecue, sip on plenty of Malbec wine, or learn a few tango moves, Argentina is the perfect place for your next adventure.
So pack your bags, lace up your hiking boots, and get ready to explore one of the most incredible countries in South America — vamos!
The Ultimate 2-Week Argentina Itinerary
This two-week itinerary through Argentina combines a little bit of everything — waterfalls, wine country, Patagonia hiking, glaciers, and city life.
This itinerary is perfect for couples and even solo travelers looking for a mix of adventure, relaxation, food, and city life. Families traveling with kids may want to skip the wine-focused portion of Mendoza or shorten their time there, so feel free to adjust the itinerary based on your travel style and interests.
Iguazú Falls → Mendoza → El Chaltén → El Calafate → Buenos Aires
Since Argentina is such a massive country, this route includes a few domestic flights, but it’s the only way to experience several distinct regions in a short time.
We began our trip at Iguazú Falls before heading west to the wineries of Mendoza and the beautiful Uco Valley. From there, we flew south to El Chaltén for hiking in Patagonia, continued to El Calafate for glacier tours, and finished the trip in Buenos Aires.
Here’s a quick breakdown of the itinerary:
- 2 Days: Iguazú Falls
- 4 Days: Mendoza & Uco Valley
- 4 Days: El Chaltén
- 2 Days: El Calafate
- 3 Days: Buenos Aires
This itinerary strikes a great balance of adventure, relaxation, and city life while still leaving enough time to truly enjoy each destination without feeling constantly rushed. It also gives you more bang for your buck by letting you experience several of Argentina’s highlights in just two weeks. That said, if the pace feels a little too fast for your travel style, consider removing one destination to allow for slower travel and extra flexibility.
Best Time to Visit Argentina
The best time to follow this itinerary is during Argentina’s spring, summer, or early fall — roughly from November through April. Since a large portion of this trip takes place in Patagonia, many of the hiking trails, tours, and hotels in places like El Chaltén and El Calafate are seasonal and operate best during the warmer months.
We visited in late November and early December, which ended up being an ideal time to go. The weather in Patagonia was cool but manageable for hiking, while northern Argentina and Mendoza were warm and sunny.
Days 1-3: Iguazú Falls
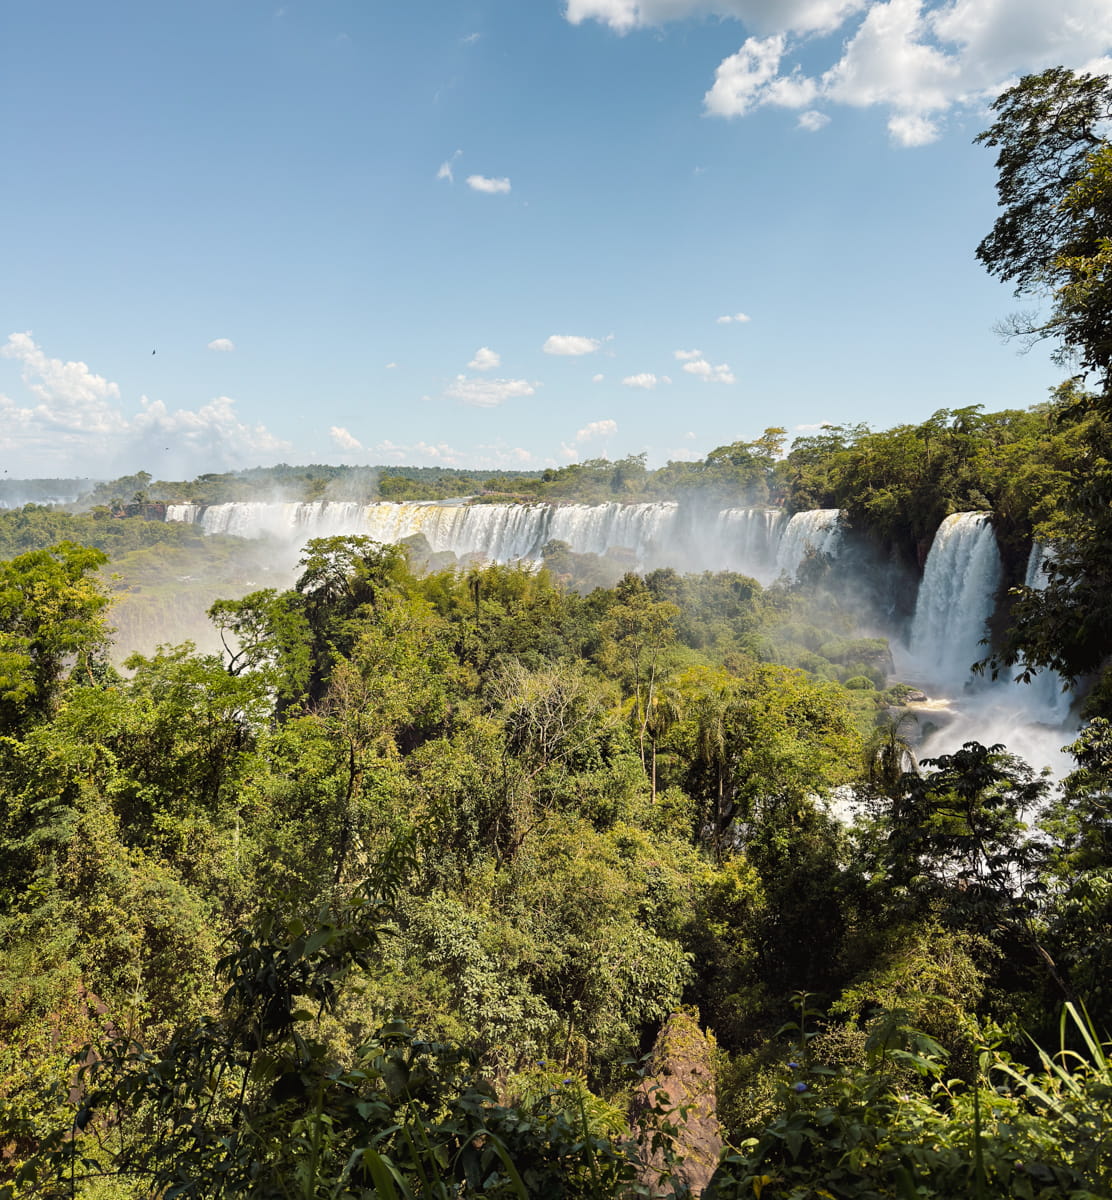
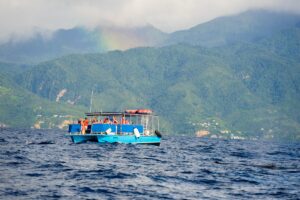
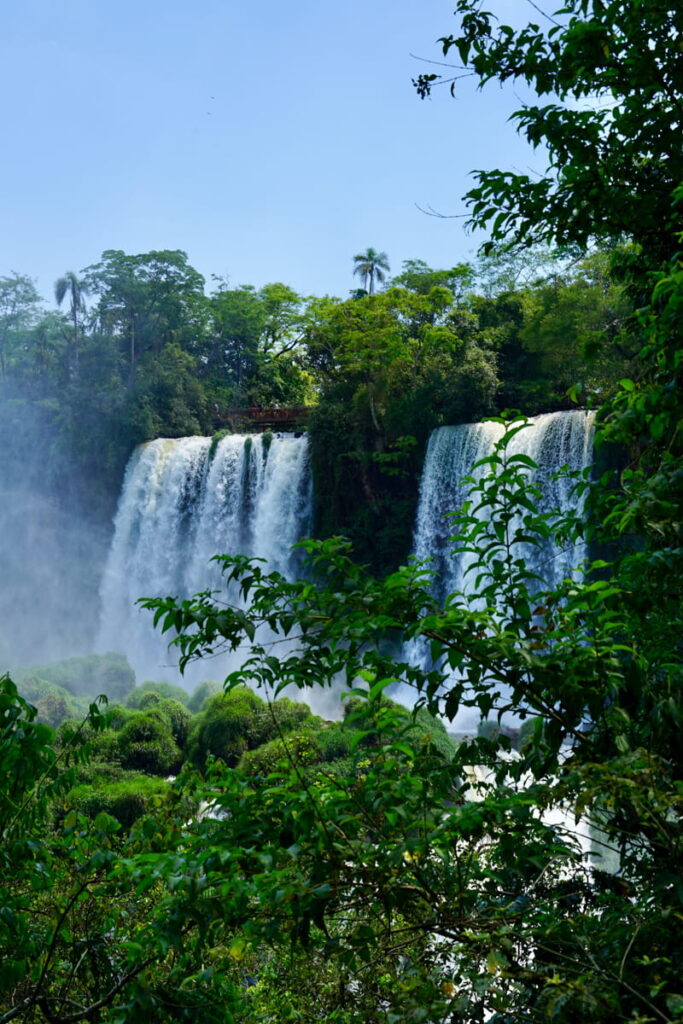
We began our trip in Argentina at Iguazú Falls, and honestly, it was the perfect introduction to this amazing country.
The waterfalls are massive, loud, humid, and something you can’t explain until you experience it for yourself. I felt like I was walking through Rivendell from The Lord of the Rings. If you’re a fan yourself, don’t miss this destination.
We spent two days exploring both the Brazilian and Argentinian sides of the falls, walking the trails through the surrounding rainforest.
If you’re planning a trip to Argentina, we highly recommend adding Iguazú Falls to your itinerary — it ended up being one of the most unforgettable parts of our entire trip.
Getting to Iguazú Falls
Beginning your trip at Iguazú Falls can be a little confusing at first because there are actually two main airports near the falls — one in Argentina and one in Brazil.
IGU (Foz do Iguaçu Airport) → on the Brazilian side
IGR (Puerto Iguazú Airport) → on the Argentine side
The Argentine airport (IGR) is smaller and mostly handles domestic flights within Argentina. The Brazilian airport (IGU) is larger, busier, and often has better international connections and flight options.
If you’re flying from another country, chances are your flight will land on the Brazilian side.
Why does this matter?
As of 2025, travelers from the United States, Canada, and Australia are required to obtain an eVisa to enter Brazil, which currently costs about $81 USD per person. The application process is fully online and fairly straightforward, but we definitely recommend applying at least a few weeks before your trip.
I did not have to apply for a visa as I hold dual citizenship and have my UK passport. My husband, however, did, and it took a few weeks before he was approved, and the total cost was around $150 USD after fees, taxes, etc.
So, if you plan on flying into Brazil or visiting the Brazilian side of Iguazú Falls, make sure to factor in the extra cost and planning time. Even with the added logistics, we still thought it was completely worth it — visiting Iguazú Falls ended up being one of the highlights of our entire trip.
Where to Stay in Iguazú Falls
For our trip to Iguazú Falls, we decided to stay on the Argentinian side both nights at La Aldea de la Selva Lodge — if you’re looking for budget-friendly but still nice, this is a great option.
The hotel is tucked away in the rainforest just outside of Puerto Iguazú, which was quiet and relaxing after long days exploring the falls. It had a more secluded jungle lodge atmosphere while still being a short drive from restaurants, the national park, and the border crossing into Brazil.
After visiting the Brazilian side of the falls and the bird sanctuary, we took a taxi to the Argentinian side to our hotel.
Taking a taxi or Uber is the best option for transport to and from the parks. There is a public bus that runs close to the hotel, but you have to cross the major highway to get to the bus stop. The hotel recommended this option, but we did not feel comfortable doing so and took an Uber instead.
Since we planned to spend most of our time on the Argentinian side of the falls anyway, staying in Argentina ended up being the most convenient option for us.
Here are a few other places to stay in Iguazú we recommend:


Visiting Iguazú Falls
During our time at Iguazú Falls, we visited both the Brazilian and Argentinian sides of the falls, and honestly, each side offers a completely different experience.
We started on the Brazilian side after landing at IGU airport, visited the largest bird park in Latin America, and then crossed the border into Argentina later that evening.
(Ensure your flight lands earlier in the day to achieve this; the Brazilian side of Iguazú Falls takes a few hours but isn’t as large as the Argentinean side.)
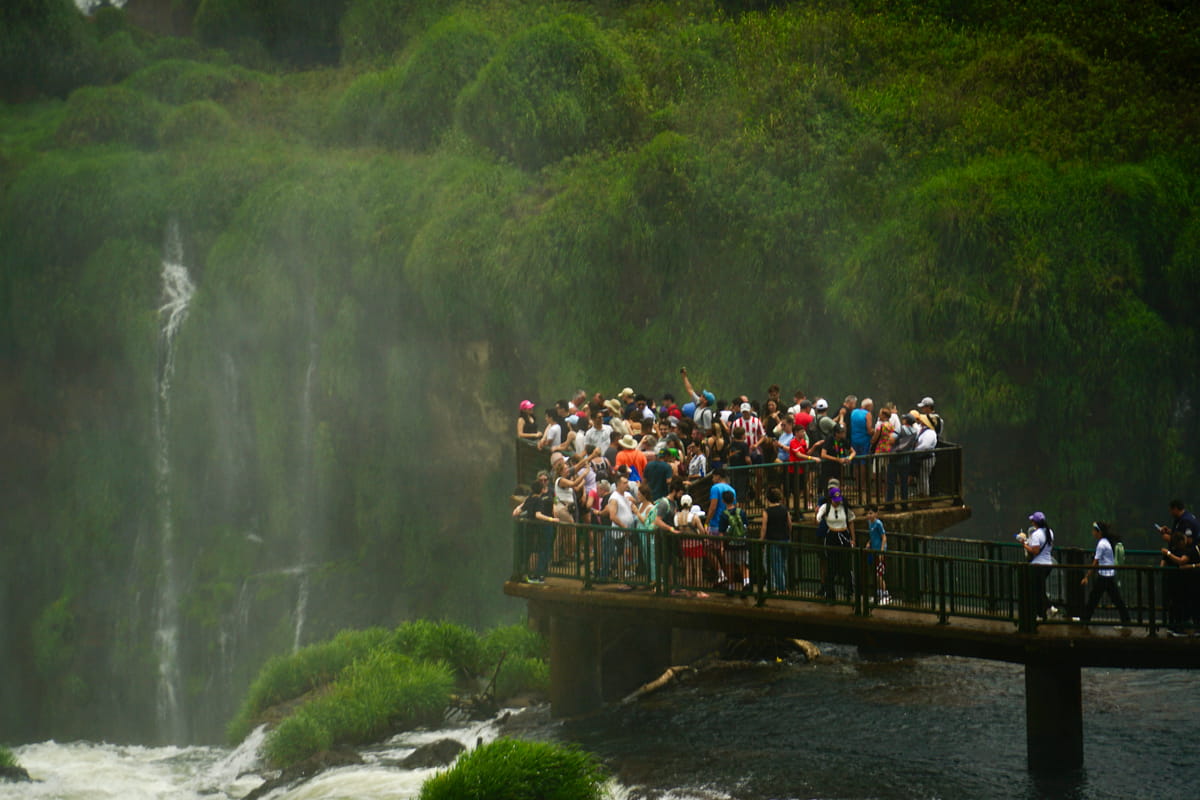
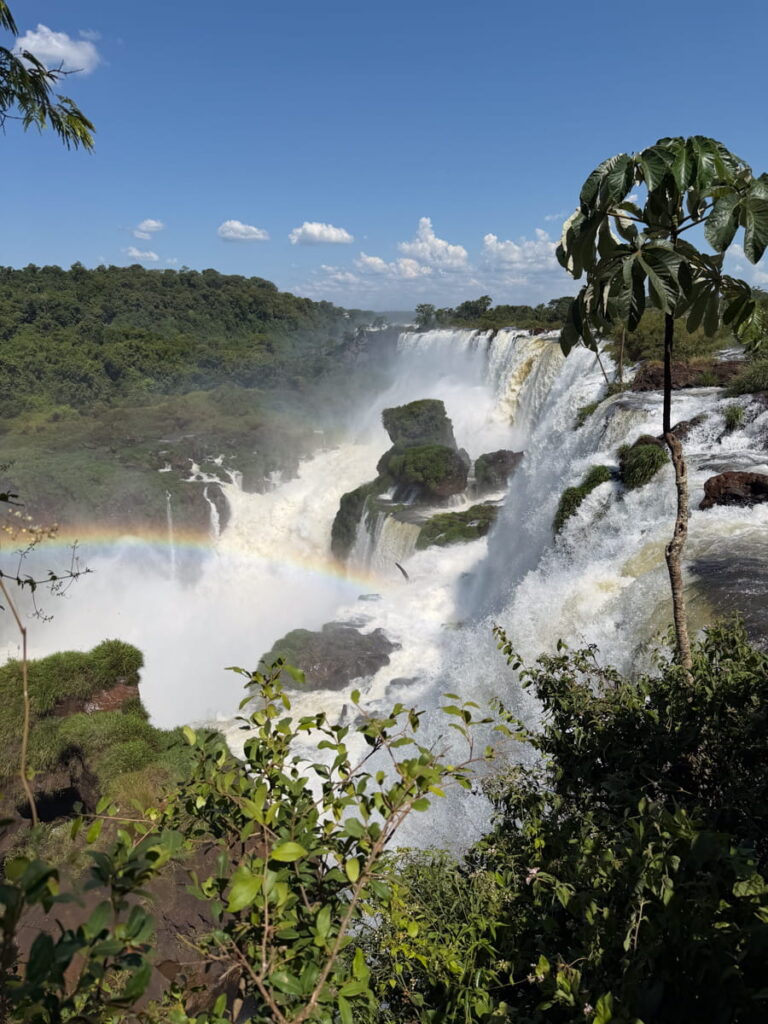
The Brazilian side gives you more panoramic views of the waterfalls (great for photos), while the Argentinian side gets you much closer to the action with long walkways stretching directly over the falls.
If you’re planning a trip to Iguazú, I highly recommend visiting both sides! However, if you must choose, the correct answer is the Argentinian side – 100%.
Days 4-7: Mendoza
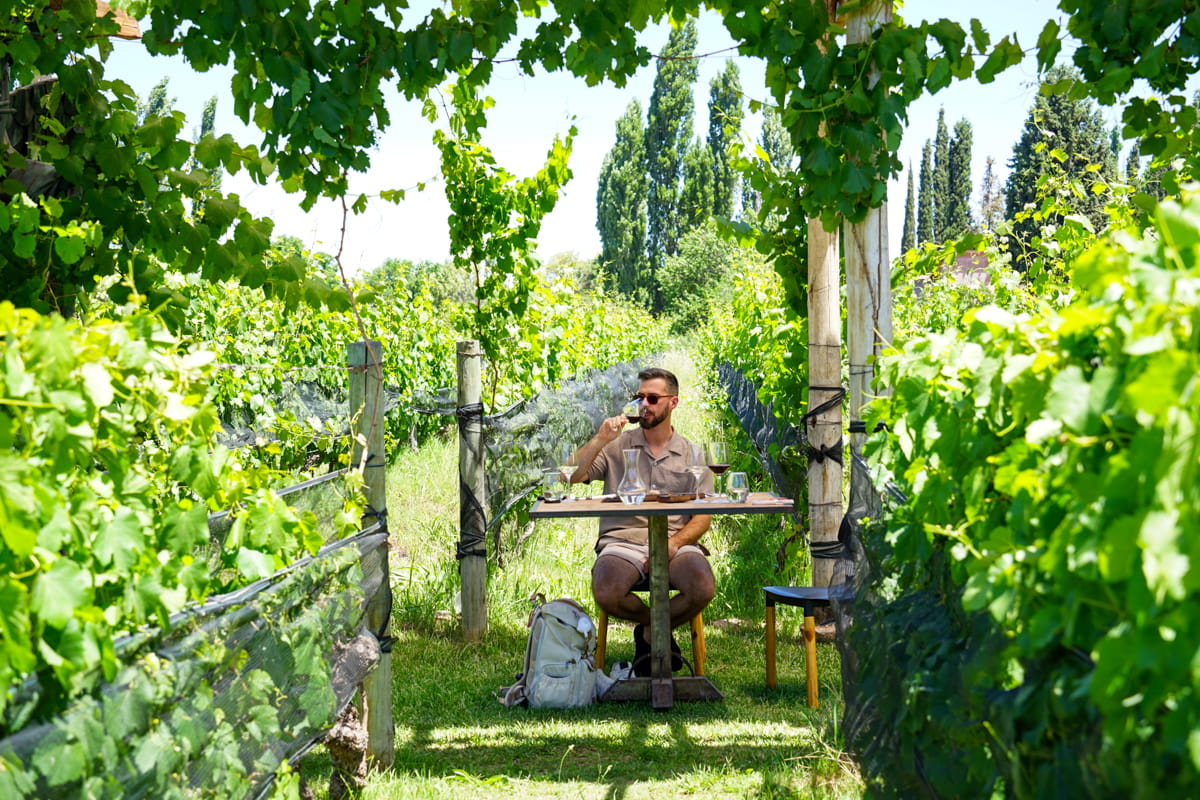
After a few days of exploring Iguazú Falls, we traded waterfalls and rainforests for vineyards and mountain views as we made our way to Mendoza — the wine capital of Argentina.
Mendoza ended up being the perfect place to slow down for a few days, relax in wine country, and enjoy a completely different side of Argentina.
Despite its desert climate, Mendoza is full of lush green vineyards that are strategically irrigated from the snow melt of the nearby Andes mountains. Because the grapes have to struggle to find water due to the dry climate, Mendoza is iconically the best place in the world for growing Malbec grapes.
How to Get to Mendoza
Iguazú Falls → Mendoza
Getting from Iguazú Falls to Mendoza will require a flight (or two) so expect a full travel day.
Look for flights leaving from IGR (Puerto Iguazú Airport) so you can avoid having to pass back into Brazil again. If this isn’t possible, don’t fret. You’ve already got your Brazil eVisa, and it won’t be a problem.
From what I’ve seen, there are NO direct flights from Iguazú Falls to Mendoza. Therefore, you’ll likely have a layover in either Buenos Aires or Cordoba. Total flight time averages around 5-8 hours.
Alternatively, there are bus routes that travel from Iguazú Falls to Mendoza that take about 35-40 hours of travel time. We do not recommend this option for time purposes.
We highly recommend renting a car in Mendoza so you can travel at your own leisure and have the freedom to visit any vineyards you’d like. Yes, there are many tours that you can take you to different vineyards, but this severely limits your flexibility to explore on your own terms.


Where to Stay in Mendoza
While Mendoza itself is relatively compact, the surrounding wine regions are much more spread out than many travelers expect.
There are three main wine regions — Luján de Cuyo, Uco Valley, and Maipú — and each one offers a completely different experience.
Because the wine regions around Mendoza are spread out, staying in one area and driving back and forth between regions every day isn’t ideal and can easily take a few hours out of your schedule. For that reason, we split our four days in Mendoza between two different regions — spending two nights in Uco Valley and two nights in Luján de Cuyo — which ended up being the perfect balance.
Luján de Cuyo
Luján de Cuyo is the most classic and well-known wine region in Mendoza, famous for its Malbec wineries, vineyard restaurants, and convenient location near the city. It’s a great option for travelers looking for a traditional wine country experience with easier logistics.
Uco Valley
Uco Valley is a more scenic and remote wine region located closer to the Andes Mountains. Known for luxury wineries, boutique hotels, and incredible mountain views, it’s perfect for a quieter and more upscale experience.
Maipú
Maipú is one of Mendoza’s oldest wine regions and is known for its relaxed atmosphere, affordable tastings, olive oil farms, and bike wine tours. Since it’s located very close to Mendoza city, it’s a popular and easy day trip option.
Choose one or two of these options and stick with them. We did some research beforehand, and it seemed like the best vineyards were located in both Uco Valley and Luján de Cuyo.
Maipú would be a great option for travelers opting OUT of renting a car, as it’s much easier to travel from one vineyard to another.
Here are the two places we stayed in Uco Valley and near Luján de Cuyo that we would highly recommend:


Choosing Which Wineries and Vineyards to Visit in Mendoza
Honestly, it wasn’t easy making reservations for the different wineries in Mendoza.
Each winery has different ways to reserve, some are online, while others require you to text via WhatsApp. Also, a lot of different wineries are closed on Monday or Tuesday. It’s not as easy as picking a few wineries you want to visit and making the reservations; you’re going to need to be flexible.
Some may say, “Well, we’ll just show up and not have a reservation.” Nope. Think again. You likely won’t be receiving a tasting, and you definitely won’t be getting a tour. Some wineries are only open to the public with a reservation; no walk-ins allowed.
But, don’t let this deter you!
There are SO many wineries and vineyards to visit in Mendoza, you just need to plan ahead.

Pick a few wineries that look interesting to you in each region you plan on visiting and write them down. Starting with your top choices, start contacting each winery via text or online platform to see what times they have available for your dates and begin reserving.
I recommend booking 2-3 per day, ensuring one includes lunch. You’re going to need to eat, and you won’t have time to drive somewhere looking for food. Some places can be a little pricey for lunch, but it’s worth not having to drive elsewhere to find food later.
We visited 8 different wineries/vineyards over the course of 4 days and spaced them out evenly.
It’s difficult to rank each winery/vineyard as they are all so different and unique in their own way. Here are a few of our favorites:
- Finca Minimal — Finca Minimal was one of the most unique winery experiences we had in Mendoza. Located in Luján de Cuyo, this small boutique winery focuses on organic wines and a farm-to-table dining experience cooked over an open wood fire. With vineyard seating, roaming farm animals, and Andes views, the atmosphere felt much more intimate and relaxed than many of Mendoza’s larger wineries. Also, the food was fantastic!
- Bodega Alfa Crux — Bodega Alfa Crux was one of the most visually impressive wineries we visited in Uco Valley. Known for its modern architecture, mountain views, and high-altitude wines, the winery felt more like an art museum than a traditional vineyard, with a majority of the building being underground.
- Bodega La Azul — Bodega La Azul was another lunch spot we tried during our winery experiences in Mendoza. Located in Uco Valley, this relaxed, family-run winery is known for its incredible Andes views, traditional Argentine lunch, and bottomless wine pairings that somehow just kept coming.
- Bodega Pulmary — Bodega Pulmary was one of the most interesting and educational winery experiences we had in Mendoza. This small family-run organic winery is led by winemaker Ramiro Maures, whose passion for the science and chemistry behind winemaking made the tour feel incredibly unique and informative. Along with delicious wines, Pulmary also produces house-made vermouth and craft beer, making it a fun change from the more traditional wineries in Mendoza.
Other wineries we visited and enjoyed included Domaine Bousquet, Familia Blanco, SuperUCO, and Bodega Hacienda del Plata.
Days 7-10: El Chaltén
Mendoza → El Chaltén
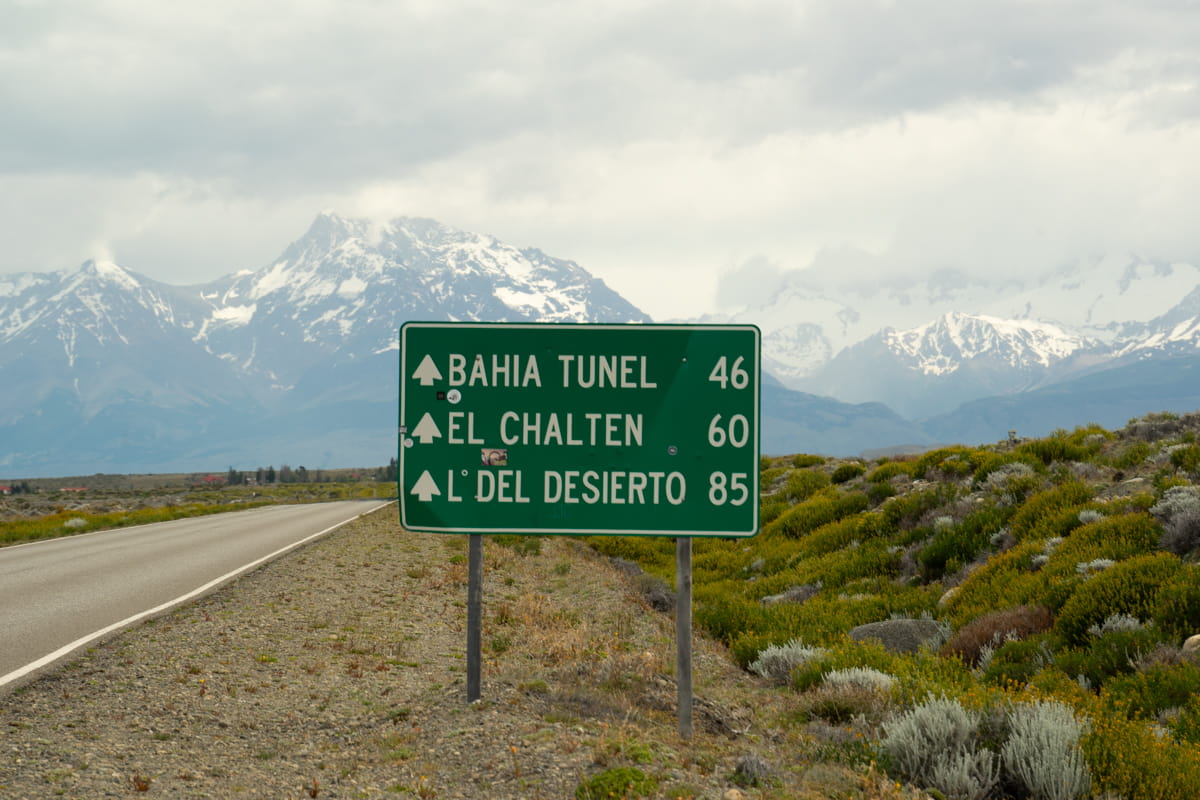
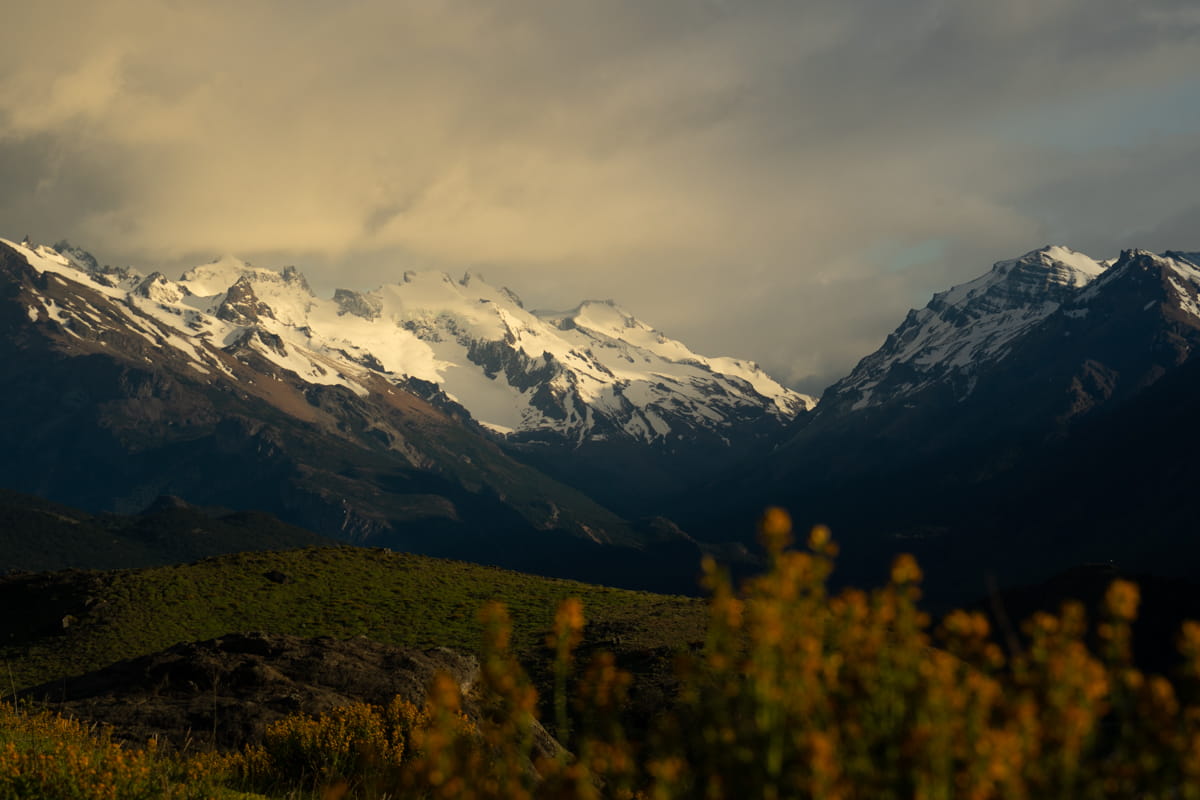
After a few relaxing days in Mendoza, we took a flight to El Calafate, picked up our rental car, and immediately drove to El Chaltén — a small mountain town in Patagonia known as the hiking capital of Argentina.
Surrounded by glaciers, turquoise lakes, and the jagged peaks of the Andes, El Chaltén ended up being one of the most breathtaking parts of our entire trip. We spent our days hiking some of Patagonia’s most famous trails before returning to town each evening for good food, craft beer, and mountain views in every direction.
Getting to El Chaltén
To get from Mendoza to El Chaltén, you’re going to need to take a flight, so plan for another full travel day. More than likely, you’ll have a layover in Buenos Aires either at the AEP or EZE airport.
Once reaching El Calafate, you’ll need to pick up your rental car and drive approximately 2.5 hours to El Chaltén.
We had a difficult time deciding between a rental car and taking the bus, but ultimately we decided on the rental car — and I’m so glad we did! We had the leisure to stop anytime to take photos (trust me, you’re going to want to), or to view the wildlife (so many guanacos!).
However, if you’re looking for a more budget-friendly option, taking the bus is only about $35 USD per person one-way. Our rental car cost us $350 (without the cost of gas) for 4 days. If you’re traveling as a couple or with more than 1 person, a rental car may still end up being cheaper.
It’s important to remember that there is only ONE gas station in El Chaltén, and sometimes they run out of gas… When arrived to El Chaltén, go ahead and fill up your car with gas, so you won’t have to worry about it when departing in a few days.
You’re likely to arrive in El Chaltén late in the evening, so go ahead and check into your hotel and explore the quaint town to find something to eat.
Where to Stay in El Chaltén
Since El Chaltén is a small mountain town and one of the most popular destinations in Patagonia, accommodations can book up surprisingly far in advance, especially during peak hiking season from November through February.
Many hotels, hostels, and cabins have limited availability, so I would recommend booking your stay as early as possible.
We decided to choose a budget-friendly option for our stay in El Chaltén and splurge more in other cities. You won’t be spending much time at your accommodation here, so it doesn’t matter.
We stayed at the Yellow House Cottage, which was within walking distance of town and about a 20-minute walk to most of the trailheads. Our cottage had a hostel-esque feel as it had a shared common area and kitchen. You’ll have your own toilet and shower, but they are located in the same common area (not privately in your room). We didn’t have a problem with this at all, but if you’d like your own private area, consider booking another accommodation.
El Chaltén Hiking Tips
El Chaltén is all about hiking. So if you aren’t too keen on hiking, you may just want to skip El Chalten altogether.
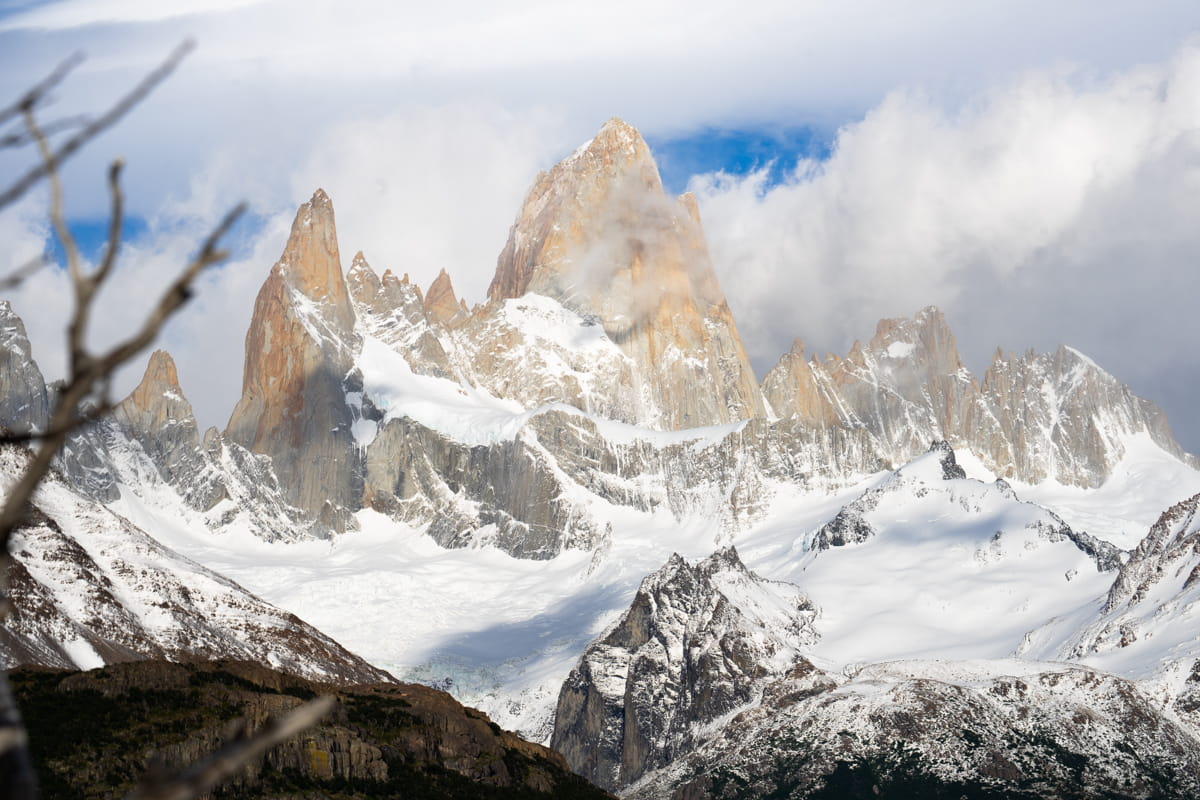
This should go without saying, but if you’re planning to hike in El Chaltén, you absolutely need a good pair of hiking boots — preferably with solid ankle support. While some of the shorter trails are manageable in regular sneakers, the most popular hikes around Mount Fitz Roy can be steep, rocky, snowy, and icy (yes, even during the summer months!).
I’m not exaggerating when I say we saw multiple people attempting these hikes in flip flops and sandals. Most of the major trails are much more challenging than they look online, and proper footwear makes a huge difference once you start climbing higher into the mountains.
Best Hiking Trails in El Chalten
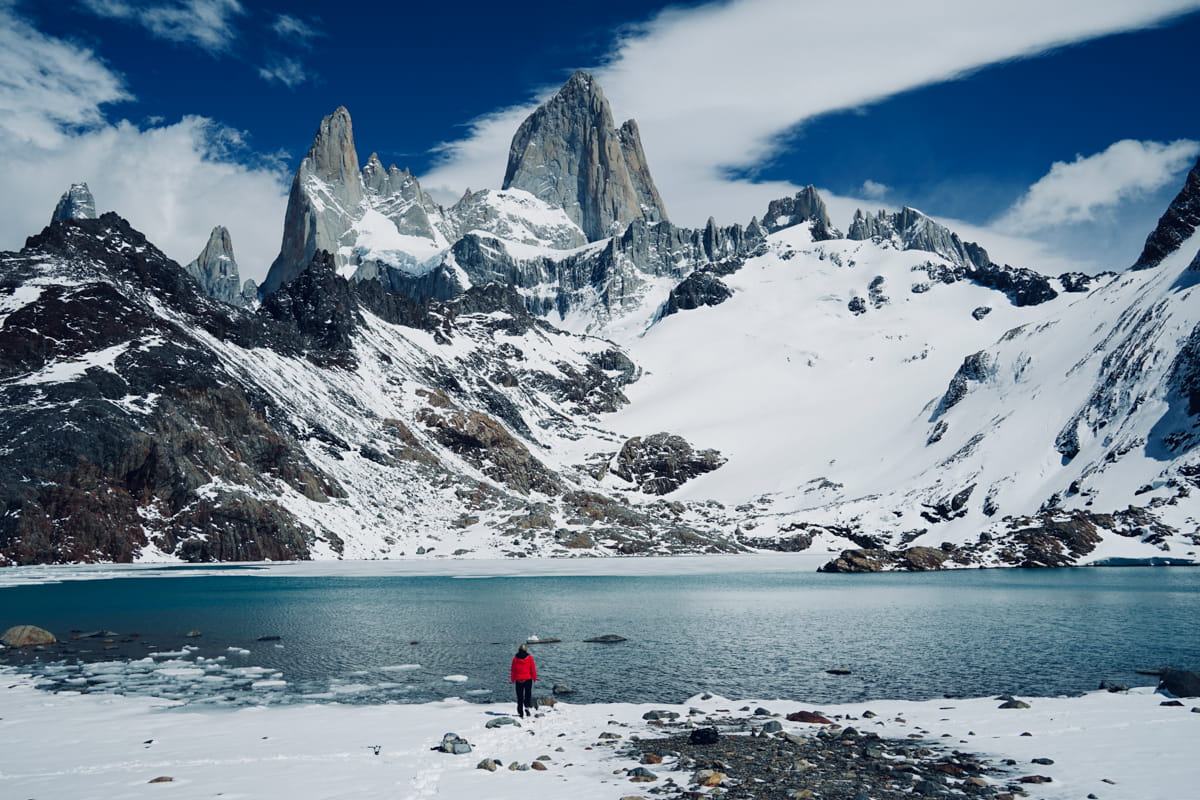
There are many different hiking trails in and around El Chaltén, all worth mentioning, but there’s one true winner — hiking Laguna de Los Tres to Fitz Roy. If it’s the only hike you do, it will be worth it.
Here are some of the best hikes in El Chaltén:
- Laguna de Los Tres (Fitz Roy)
- 8-10 hours
- 20-22 km (12-14 miles), roundtrip
- 1000 meters (~3,300 ft)
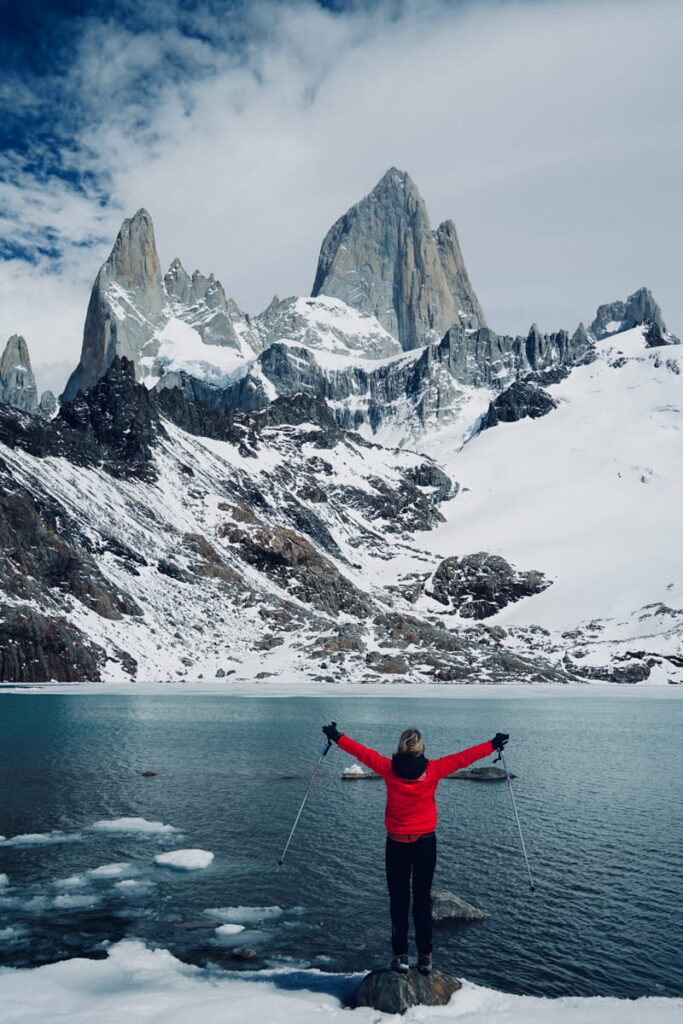
The Laguna de los Tres hike is the most famous trail in El Chaltén and one of the best hikes in all of Patagonia. This challenging full-day trek will take you through forests, rivers, and mountain valleys before ending at a bright turquoise glacial lake sitting directly beneath the towering peaks of Mount Fitz Roy.
We read before going that this hike was moderately challenging, which is true. Except for the last mile. I read multiple blogs about this hike and wasn’t too worried about it, but let me tell you, it’s not for the weak. The last mile is CHALLENGING.
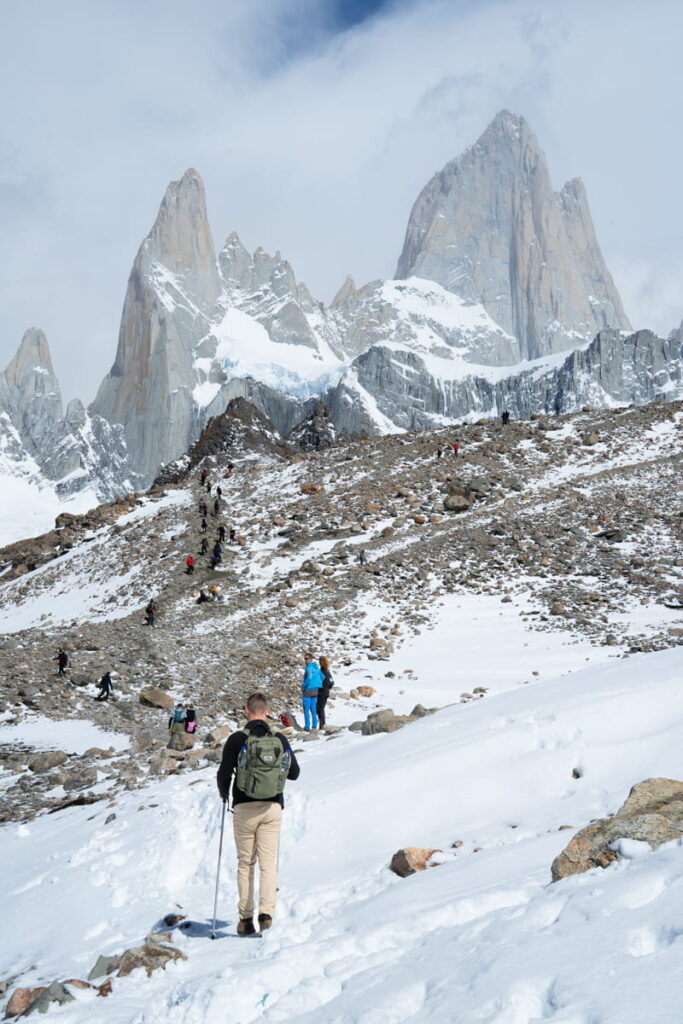
I hike often and would consider myself in good shape, but the last mile of this hike challenged me in every way possible. It’s rocky, steep, muddy, wet, and icy. Not only are you having to navigate the trail, but you’re also weaving around crowds of people hiking both up and down the mountain at the same time.
This isn’t to deter you from doing it. I 100% believe you can! Just remember to pace yourself and wear proper footwear.
I’d also recommend starting the Laguna de los Tres hike extremely early — ideally around 5–6 AM — so you can beat the majority of the crowds heading up the mountain. You’ll be thanking yourself on the way back down as you pass hundreds of people still making their way up the trail.
Note that there is another starting point to Laguna de Los Tres that lots of people will recommend: Hosteria El Pilar/Rio Electrico. However, reaching this trailhead requires you to drive approximately 30 minutes via taxi or bus, and most shuttles do not depart until around 8:00 AM or later, which means you’ll be a part of the massive crowd instead of ahead of it.
- Laguna Torre
- 6-8 hours
- 17.7-19.3 km (11-12 miles) roundtrip
- 400 m (~1,300 ft)
The Laguna Torre hike is another popular trail in El Chaltén, offering stunning views of glaciers, alpine lakes, and Cerro Torre’s dramatic granite peaks. Compared to the Laguna de los Tres hike, this trail is much less steep and generally considered moderate in difficulty.
- Mirador de los Cóndores
- 1-2 hours
- 3.2 km (2 miles) roundtrip
- 150 m (~500 ft)
If you’re looking for a shorter and easier hike, Mirador de los Cóndores is a great option. This quick uphill trail overlooks El Chaltén and offers panoramic views of the surrounding mountains and valleys, especially at sunrise or sunset.
- Laguna Capri
- 2-3 hours
- 8 km (5 miles) roundtrip
- 240 m (800 ft)
Laguna Capri is a shorter hike along the beginning section of the Fitz Roy trail. This is an easier alternative to Laguna de los Tres since you still get incredible views of Mount Fitz Roy without completing the difficult final ascent.
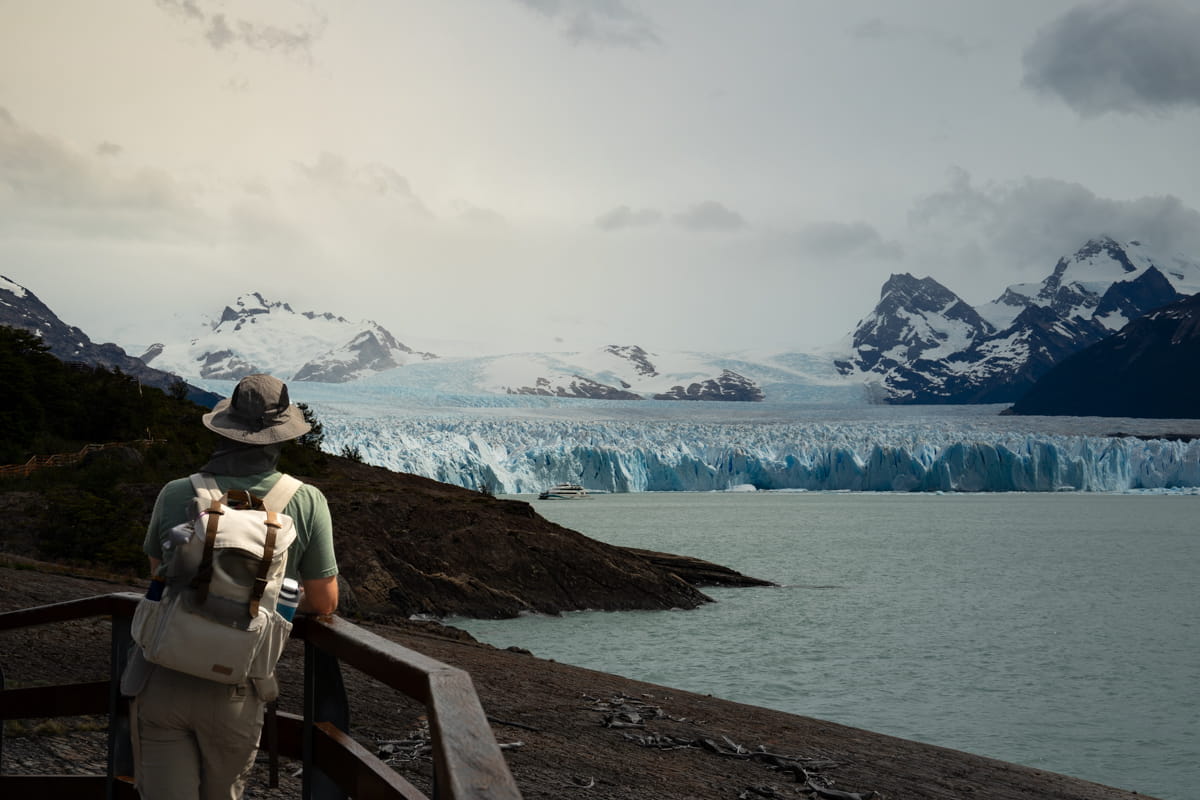
Days 10-12: El Calafate

After several days of hiking in El Chaltén, we made our way to El Calafate — the gateway to some of Patagonia’s most famous glaciers. While El Calafate itself is much larger and more touristy than El Chaltén, it’s the perfect base for exploring Perito Moreno Glacier and the surrounding landscapes of Los Glaciares National Park.
Compared to the intense hiking days in El Chaltén, this part of the trip felt slower-paced while still being one of the most unforgettable experiences in Patagonia.
Getting to El Calafate
If you ended up renting a car, then you’ll just need to take the same road back to El Calafate.
Remember, there is only one gas station in El Chaltén, and sometimes they run out of gas. Make sure you have a full tank before leaving.
If you rode the bus, you’ll need to take the bus back to El Calafate and then an Uber or taxi to your accommodation.
Since it only takes a couple of hours to get from El Chaltén to El Calafate, consider taking it slow that morning. Grab breakfast, enjoy one last coffee with mountain views, and if your legs are still functioning after all the hiking, squeeze in a short trail before making the drive south.
Where to Stay in El Calafate
El Calafate is a lot larger and spread out than El Chaltén, so it’s less likely you’ll be able to walk to town unless you find somewhere to stay within walking distance.
If you have a rental car, the location of your hotel doesn’t really matter, and finding parking in the city center isn’t too difficult.
We stayed at Bla Lodge, which turned out to be a great, budget-friendly option in El Calafate. The breakfast was a little BLAnd (LOL), but overall the hotel was comfortable, clean, and hard to beat for the price.
More places to stay in El Calafate:


Things to Do in El Calafate
Trek on Perito Moreno Glacier
One of the absolute highlights of our trip was trekking directly on the Perito Moreno Glacier. Walking across the massive blue ice fields with our spikey crampons, surrounded by glaciers and mountains and even a beautiful waterfall, felt surreal, and it ended up being one of the most memorable experiences we had in all of Argentina.
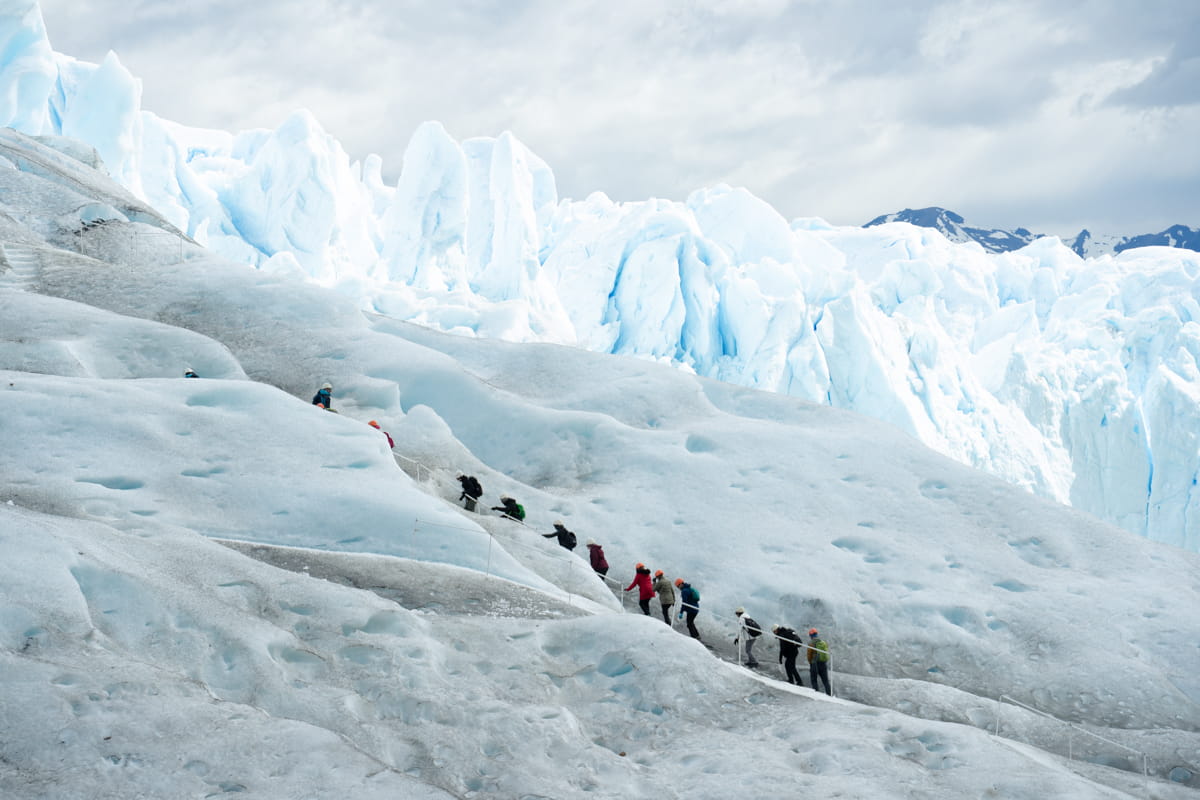
This glacier trekking tour wasn’t cheap, but in our opinion, it was 100% worth every penny.
Alternatively, you can take a guided tour to the national park, which includes a boat cruise (no trekking included).
Go Horseback Riding
Don your cowboy hat and experience what it’s like being a true gaucho (Argentinian cowboy) by taking this horseback riding tour along Cerro Frías, which includes a delicious meal at an Estancia.
Walk Through Laguna Nimez Reserve
After several intense hiking days in Patagonia, walking through Laguna Nimez Reserve was a nice, slower-paced activity in El Calafate. The trails are easy and peaceful, with views of the lake, mountains, and lots of birds and flamingos throughout the reserve.
Eat Patagonian Lamb
El Calafate is known for its Patagonian Lamb, so when in Rome, right?
Lamb is one of my favorite foods; some of the best I’ve tried were during my time in Iceland, so I had to try it to compare.
We tried a couple of places – the place I would recommend would be Lucinda Casa Campo. This is a unique dining experience where you’ll be served delicious, authentic Argentinian dishes in a communal setting. For reservations, message on WhatsApp.
I would NOT recommend Parilla Don Pichon as it was overly touristy, and the food and service was no bien.
Visit Glaciarium Patagonian Ice Museum
Glaciarium is a modern glacier museum located just outside El Calafate that explains the science, history, and environmental impact of Patagonia’s glaciers. It’s a great rainy-day activity or a good option if you want to learn more about the region before visiting Perito Moreno.
Days 12-15: Buenos Aires
After exploring glaciers, mountains, and wine country, we finished our two weeks in Argentina in Buenos Aires.
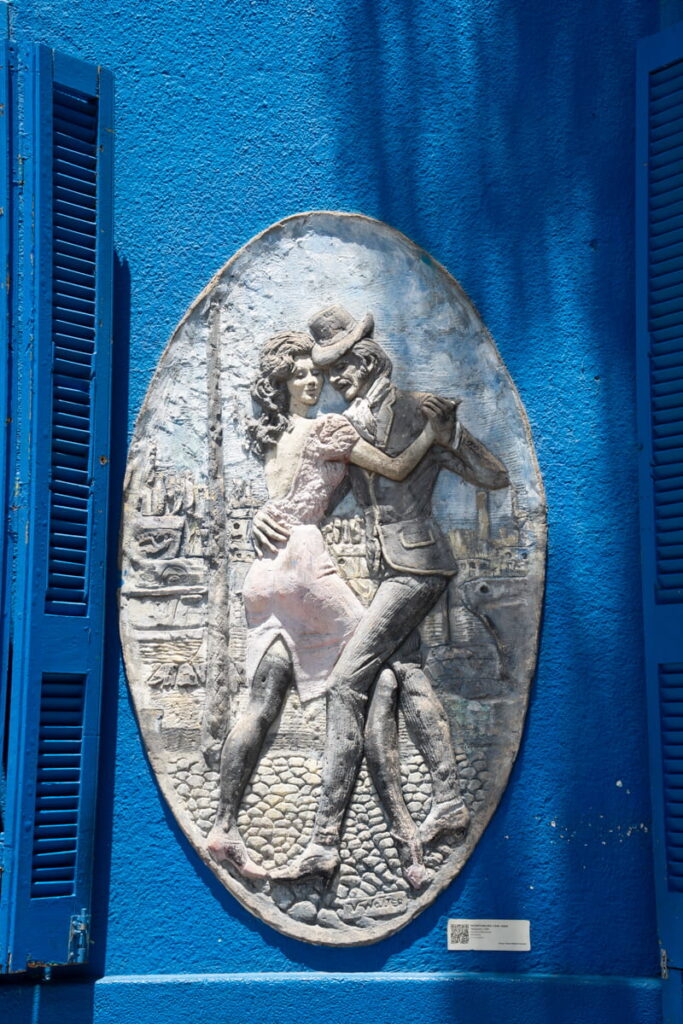
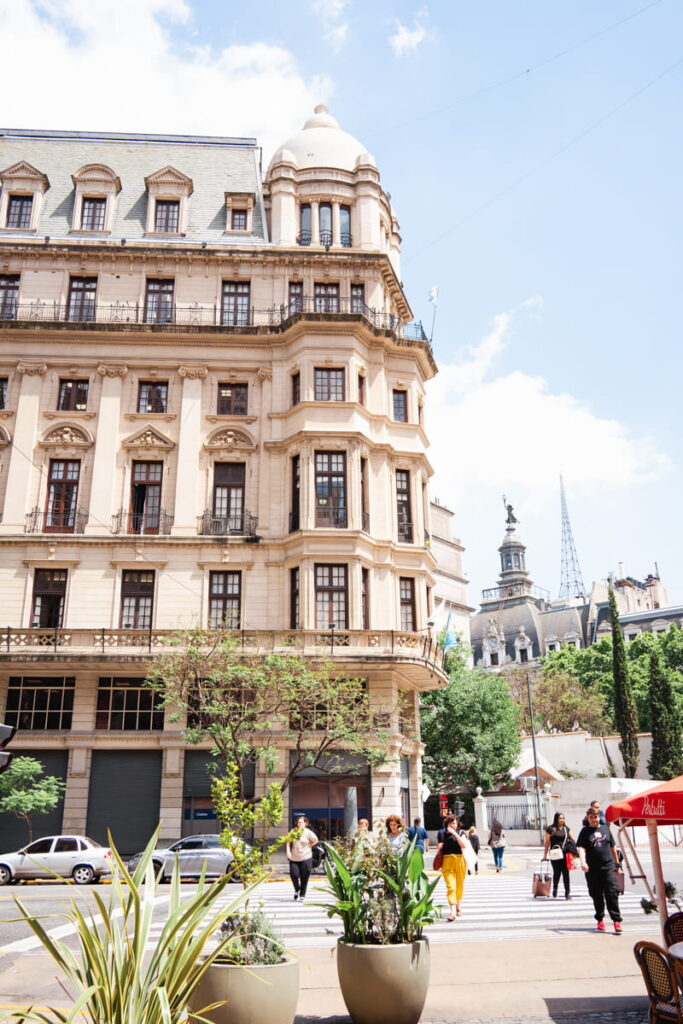
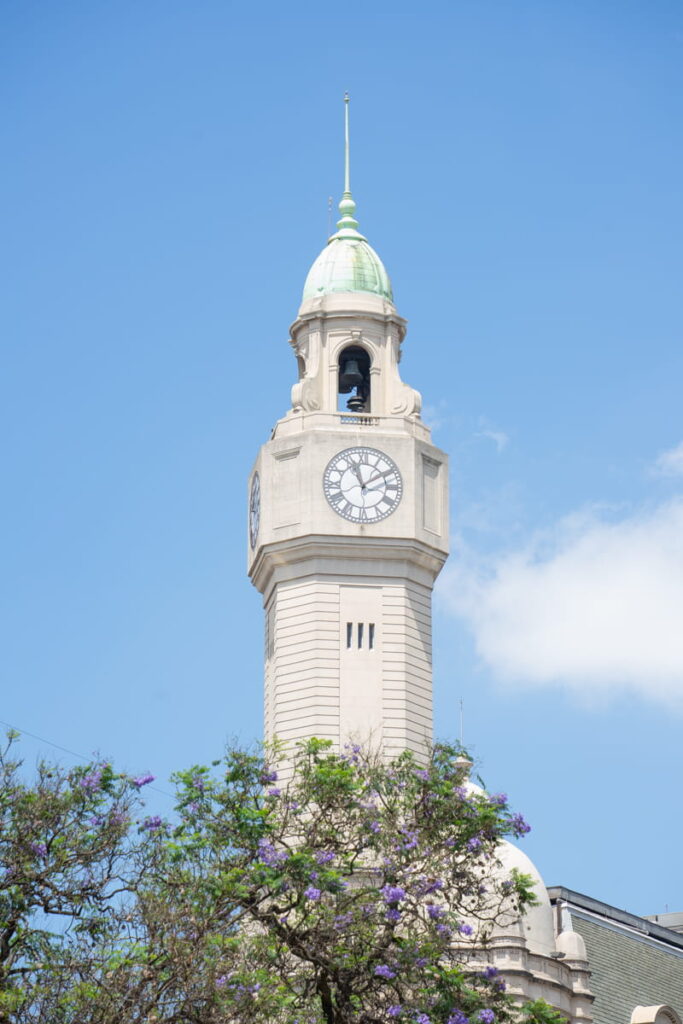
Known for its European-style architecture, incredible food scene, tango culture, and lively neighborhoods, Buenos Aires felt completely different from the rest of the trip. It was nice to slow down, explore the city, eat great food, and experience a completely different side of Argentina before heading home.
I almost always prefer to leave the city portion of a trip until the end. By that point, I know I’ll be tired and it’s nice being able to slow down a bit before flying home. Ending the trip in Buenos Aires also made logistics much easier since we were already near the international airport for our flight back home.
Getting to Buenos Aires
El Calafate → Buenos Aires
Okay, you’re probably tired of flying by now, but this is the last domestic flight of the trip. And on the bright side, you won’t have a connecting flight this time.
Drop off your rental car (if applicable) at the airport and board your next flight to the bustling city of Buenos Aires.
We took an Uber from Buenos Aires airport to our accommodation in the city, about a 45-minute ride.
Where to Stay in Buenos Aires
We stayed in San Telmo at L’Adresse Hotel Boutique, and absolutely loved the area. Compared to some of the more modern parts of Buenos Aires, San Telmo feels much more historic and local, with cobblestone streets, old buildings, tango bars, antique shops, and tons of restaurants and cafes. It definitely has a little bit of a grungier feel, but in a charming way.
We also thought it was a great area to stay because it felt very central to everything we wanted to do. We could easily walk to places like Plaza de Mayo, Casa Rosada, Puerto Madero, and several other attractions around the city.
Other popular neighborhoods to stay in include Palermo, known for nightlife and trendy restaurants, and Recoleta, which feels a little more upscale and quieter. But overall, we were really happy we chose San Telmo.


Things to Do in Buenos Aires
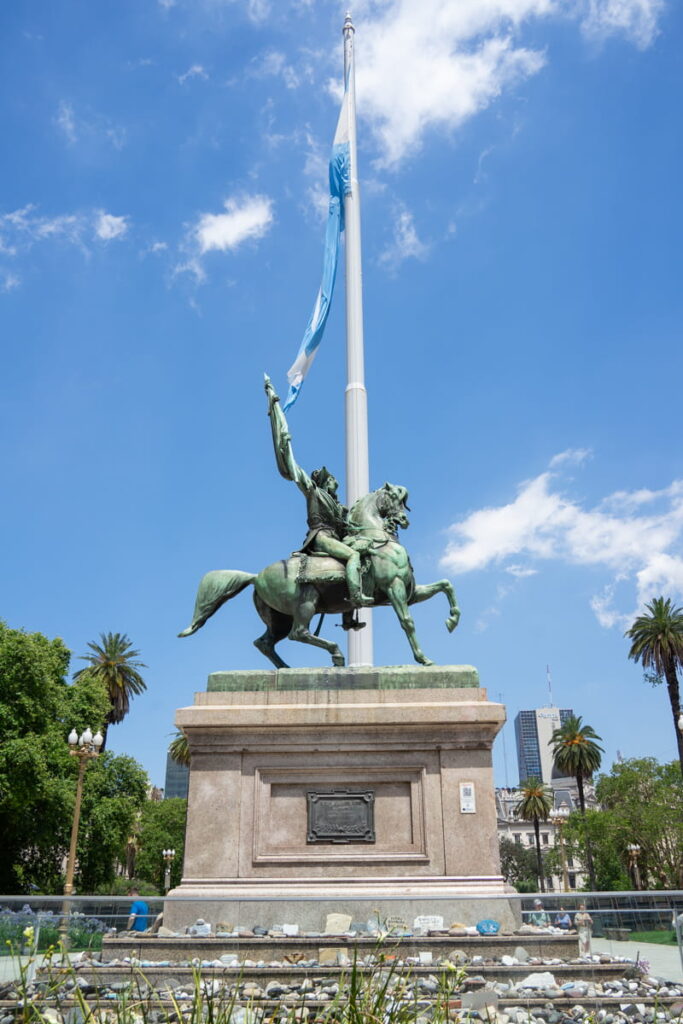
1. Visit Plaza de Mayo
One of the most historic areas in Buenos Aires, Plaza de Mayo is home to several important landmarks and is a great starting point for exploring the city.
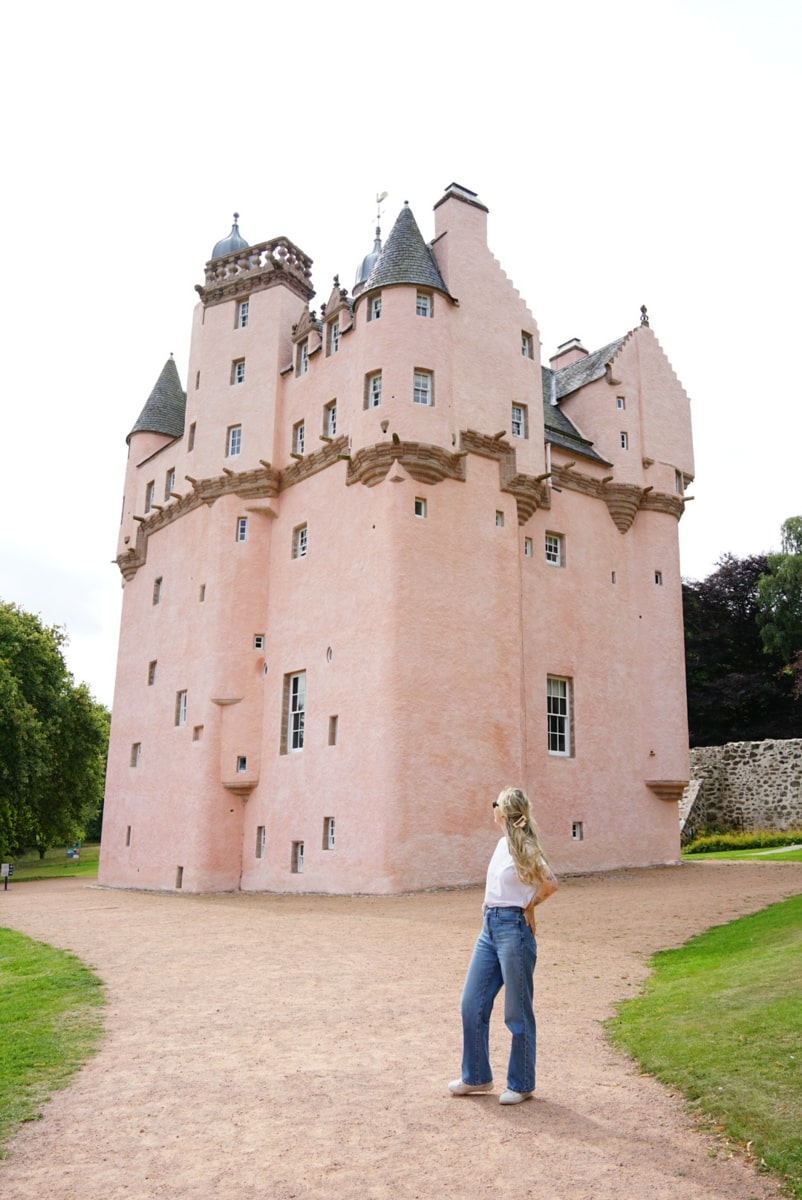
2. See Casa Rosada
The famous pink presidential palace is one of Buenos Aires’ most recognizable buildings and sits directly in Plaza de Mayo.
3. Walk Around San Telmo
San Telmo is one of the most charming neighborhoods in the city, known for its cobblestone streets, tango bars, cafes, and antique shops.
4. Explore Palermo
Palermo is filled with trendy cafes, restaurants, bars, boutiques, and parks. It’s one of the best neighborhoods for nightlife and food.
5. Visit Recoleta Cemetery
One of the most famous cemeteries in the world, Recoleta Cemetery is known for its elaborate mausoleums and historic tombs.
6. Walk Along Puerto Madero
Puerto Madero is the modern waterfront area of Buenos Aires with restaurants, skyline views, and walking paths along the river.
7. Watch a Tango Show
Buenos Aires is the birthplace of tango, so seeing a live tango performance is one of the most popular things to do in the city.
Final Thoughts
Argentina quickly became one of our favorite countries we’ve ever visited.
It’s hard to believe one country can have such variety, from massive waterfalls, world-class wine regions, glaciers, mountains, and vibrant cities.
While two weeks in Argentina definitely involves a lot of moving around and planning, we felt like this itinerary gave us the perfect mix of adventure, relaxation, hiking, food, and city life.
From standing beneath the waterfalls of Iguazú Falls to hiking through Patagonia and ending the trip with steak and wine in Buenos Aires, this ended up being one of the most unforgettable trips we’ve ever taken.
Hopefully, this itinerary helps make planning your own trip to Argentina a little easier.
¡Buen Viaje!
Don't wait; begin planning your vacation with these quick links!
- ✈️ Flights - Snag the best flights by booking early!
 Car Rentals - Renting a car is essential for off-the-beaten-path adventures!
- 🏨 Hotels/Stays - Stay in the best hotel or vacation rental
 Travel Essentials - Need any last-minute items or gear?
- 🎟️ Tours - Book exciting and adventurous tours for your vacation
- 🛜 Connectivity: To stay connected, purchase an Airalo eSIM before traveling to another Country (a must-purchase when traveling abroad!).